
A family emergency plan is a written, practised strategy that tells every household member exactly what to do, where to go, and who to contact during a crisis. Despite the clear value of having one, fewer than 39% of households have written their plan down. That gap between intention and action is where real risk lives. Emergency plans for families work best when they are specific, rehearsed, and stored somewhere everyone can access, even when the power is out and phones are dead.
What should a family emergency plan include?
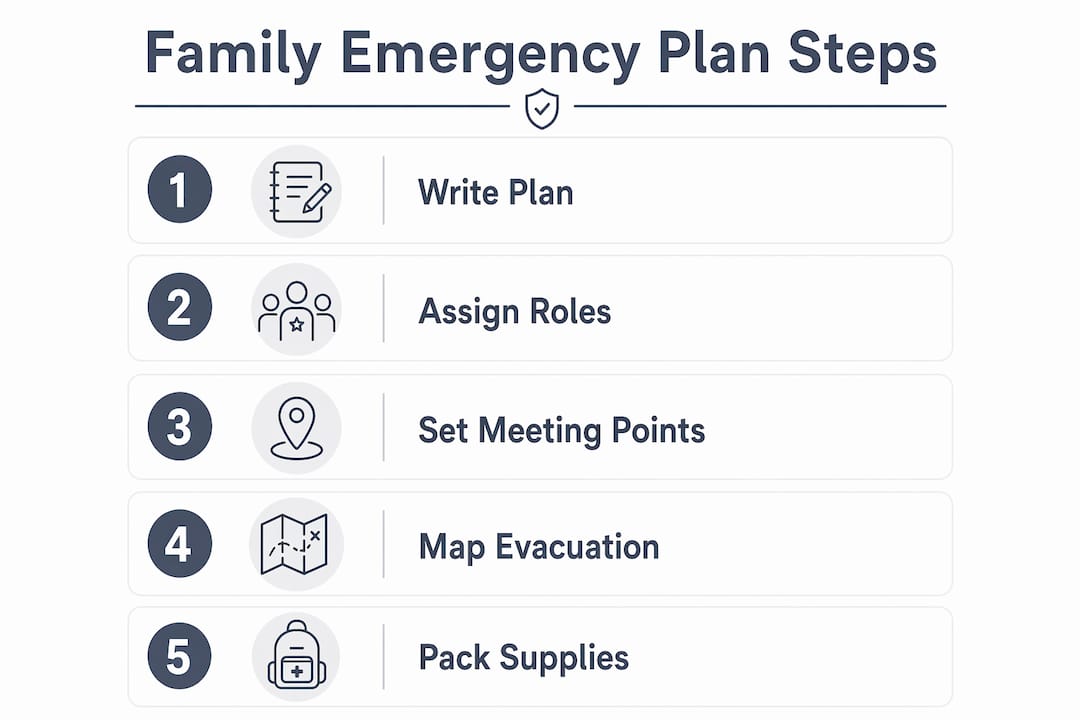
A complete family emergency plan covers communication, meeting points, evacuation routes, and tailored supply needs. Each element must be written down, not just discussed over dinner once and forgotten.
Communication strategy

Mobile networks congest fast during emergencies. Text messages succeed at higher rates than voice calls during network congestion, because texts use far less bandwidth. Every family member should know the name and number of one out-of-area contact who can relay messages between people who cannot reach each other directly. Write that number on a card and keep it in every school bag and wallet.
Meeting points
Families need two meeting points: one directly outside the home for immediate evacuations such as a house fire, and one outside the neighbourhood for broader emergencies like a flood or chemical spill. The second location should be a place everyone knows without needing GPS, such as a local library or a relative's house in the next suburb.
Evacuation routes and exit plans
Map at least two exit routes from every room in the house. Check that windows open fully and that children can operate the latches themselves. Walk the routes with your family so the path is muscle memory, not a panicked guess.
Tailored supplies for every family member
A generic kit does not serve a family with an infant, an elderly grandparent, or a pet. Infants need formula, nappies, and a portable cot. Seniors may need mobility aids and a printed medication list. Pets need food, water, a carrier, and vaccination records. Build the kit around the people and animals actually in your household.
Physical copies of the plan
Printed copies kept in waterproof bags are non-negotiable. Mobile devices lose power, get lost, or simply fail at the worst moment. A laminated card with key contacts and meeting points costs almost nothing and works every time.
Pro Tip: Assign specific roles to each family member, such as who grabs the documents, who handles the pet, and who shuts off the gas. Clear role assignment reduces confusion and speeds up evacuation significantly.
How to build your family emergency kit
The standard recommendation is a kit that sustains your household for at least 72 hours during evacuation and 7–14 days for shelter-in-place events. That gap between 72 hours and two weeks is where most families fall short.
Core supplies to gather first
- Water. The minimum is 1 litre of water per person per day for drinking, with extra for sanitation and cooking. Store it in sealed, food-grade containers and replace it every six months.
- Food. Choose non-perishable items your family actually eats: tinned fish, dried fruit, muesli bars, and long-life milk. Rotate stock every 6–12 months so nothing expires unnoticed.
- Medications and first aid. Keep a printed list of all prescriptions, dosages, and the prescribing doctor. Include a basic first aid kit with bandages, antiseptic, and a thermometer.
- Documents. Store copies of passports, birth certificates, insurance policies, and Medicare cards in a waterproof folder inside the kit.
- Power and light. A hand-crank or solar torch, spare batteries, and a portable phone charger cover most scenarios.
- Special needs items. Formula and nappies for infants, mobility aids for seniors, and pet food and carriers for animals.
Pro Tip: Use a printed emergency preparedness checklist to build your kit in stages over a few weeks. Buying everything at once is expensive and overwhelming. Spreading it across grocery shops makes it manageable.
Storing and maintaining your kit
Store the kit in a cool, dry place that every adult in the household can access quickly. A cupboard near the front door works well. Set a calendar reminder every six months to check expiry dates, test the torch, and top up water supplies. A kit that has not been checked in two years is not a safety net. It is a false sense of security.
How to practise and communicate your emergency plan
A plan that has never been rehearsed is just a piece of paper. Practising evacuation routes twice per year is the recommended minimum, and fire safety standards suggest a household should be able to evacuate within two minutes of an alarm sounding. That is a tight window, and it only happens with practice.
Running effective drills
Time your drills. Two minutes sounds generous until you factor in a child who cannot find their shoes, a dog that will not come, and an adult who forgot where the emergency kit is. Run the drill at different times of day, including at night, so the route is familiar in the dark. After each drill, talk through what worked and what did not.
Involving children without causing fear
Children involved in preparedness activities show reduced anxiety and better recall during real emergencies. The key is framing. Call it a "safety practice" rather than a disaster drill. Give children a specific job, such as carrying the family torch or checking that the pet is secured. Responsibility builds confidence. Teach children their full name, home address, and the out-of-area contact number by heart, because memorising key contact details is critical when panic sets in and phones are unavailable.
Keeping communication lines open
Agree on a check-in schedule before any emergency happens. For example, if a bushfire warning is issued, every family member texts the out-of-area contact by a set time. That contact then relays information to others. This system works even when local networks are congested, because the out-of-area contact is calling from a different exchange.
Pro Tip: Write the out-of-area contact's number on a small card and tape it inside every child's school bag. Schools often have no way to reach a parent during a local emergency, but they can call an interstate relative.
Common mistakes that make emergency plans fail
Most family emergency plans fail not because they are badly designed, but because they are never updated or practised. The most common mistakes are predictable and fixable.
- Planning paralysis. Families wait until the plan is "perfect" before writing anything down. A simple one-page plan that is practised beats a detailed document that sits unfinished on a laptop. Creating a foundational plan takes about two hours of dedicated time. Start there.
- Outdated contact information. Phone numbers change. People move. A contact list that is two years old may be useless when you need it most. Review all contacts every six months alongside your kit check.
- No physical copy. Storing the plan only on a phone or in a cloud folder means it disappears the moment the battery dies or the network goes down.
- Ignoring special needs. A plan that works for two healthy adults does not automatically work for a family with a toddler, a teenager with a disability, or an elderly parent. Every person's needs must be explicitly addressed.
- Skipping the review cycle. Emergency plans require updates every 6–12 months to account for expired supplies, changed medications, new family members, and updated contact details. Set a recurring calendar reminder and treat it as non-negotiable.
The fix for all of these is the same: treat the plan as a living document, not a one-time task. Schedule the review, run the drill, and update the kit. Repeat.
Key takeaways
A written, practised family emergency plan is the single most effective step any household can take to reduce harm during a crisis.
| Point | Details |
|---|---|
| Write it down | Fewer than 39% of households have a written plan; a physical document is the foundation of real preparedness. |
| Two meeting points | Designate one spot outside the home and one outside the neighbourhood so everyone knows where to go. |
| Kit for 72 hours minimum | Build supplies for at least 72 hours of evacuation and 7–14 days of shelter-in-place, tailored to your family's specific needs. |
| Practise twice a year | Run timed drills at least twice per year and involve children with age-appropriate roles to build confidence. |
| Review every 6–12 months | Update contacts, check expiry dates, and revise the plan whenever your family's circumstances change. |
What I've learned from watching families prepare (and not prepare)
The families who handle emergencies best are not the ones with the most expensive kits or the most detailed plans. They are the ones who practised. I have seen households with colour-coded binders and laminated checklists freeze completely during a drill because they had never actually walked the route. The plan looked impressive. It just had not been lived in.
The other thing that strikes me is how much children can carry when you give them something real to do. A six-year-old who knows their job is to grab the torch and lead the dog to the front gate is not a frightened passenger. They are a participant. That shift in identity matters enormously when the smoke alarm goes off at 2 AM.
Start smaller than you think you need to. A single page with two meeting points, one out-of-area contact, and a list of who does what is enough to begin. You can add the detailed kit, the earthquake-specific protocols, and the shelter-in-place supplies over the next few months. The worst plan is the one that never gets written because you were waiting to do it properly.
Community matters too. Knowing your neighbours, sharing your out-of-area contact with them, and understanding who on your street has mobility challenges or medical needs creates a safety net that no app or kit can fully replace. Preparedness is not a solo project.
— Floyd
How Peershield supports your family's safety
Building a solid emergency preparedness plan for families is the foundation. Peershield adds a real-time layer on top of it.

Peershield's STREETBLITZ app alerts community members within a 2km radius when you need help, not just your saved contacts. That wider net means real people nearby can respond when it matters most. Features like safety flares, check-in timers, and a family dashboard give every household member a way to signal their status and location without continuous tracking. For families who want practical tools that work alongside their written plan, Peershield's safety solutions offer a privacy-first approach built for everyday Australian life.
FAQ
What should a family emergency plan include?
A family emergency plan must include two meeting points, an out-of-area contact, evacuation routes, assigned roles for each family member, and a physical copy of all key information stored in a waterproof location.
How often should we update our family emergency plan?
Update your plan every 6–12 months to check expiry dates on supplies, refresh contact information, and account for any changes in your family's medical needs or living situation.
How do emergency plans for kids work best?
Children respond best when they are given a specific role in the plan, such as carrying the torch or securing the pet. Teaching children their full name, home address, and an out-of-area contact number by heart builds confidence and reduces panic during real emergencies.
How much water should a family emergency kit contain?
The minimum is 1 litre of water per person per day. For a family of four preparing a 72-hour evacuation kit, that means at least 12 litres stored in sealed, food-grade containers.
What is the difference between an evacuation kit and a shelter-in-place kit?
An evacuation kit is portable and covers at least 72 hours of supplies for leaving home quickly. A shelter-in-place kit stays at home and should cover 7–14 days, including larger water and food stores, medications, and comfort items for an extended stay indoors.